(**) Disclosure: This post may contain affiliate links, meaning our company, JCHQ Publishing will get a commission if you decide to make a purchase through the links, but at no additional cost to you.
We always say that the first impression is of the utmost importance. When a potential home buyer is searching for a property, real estate photos are the first thing they would see. I’ve seen listings with no pictures or that they were poorly taken. If the sellers don’t even spend effort on the sales photos, I’m doubtful how well they can maintain a property.
How to Prepare for Real Estate Photos? To prepare real estate photos, you must stage the house properly, have good light fixtures, and declutter excessive, unnecessary items.
To give you a better understanding of how to prepare real estate photos, I have the pleasure of connecting to Lisa Rabe and Charlie Misicka.
In this exclusive interview, Lisa and Charlie will share with you their hands-on experience and practical tips to take beautiful photos for a listing property.
Before we get into the interview, here are some interesting facts about our guests
About Lisa Rabe
Lisa is also known as the Real Estate Girl Guru. I met her through a professional connection on LinkedIn. Her amazing works for her clients really caught my attention.
She is a real estate broker in Fox Lake, Illinois. In addition to being in the real estate sales profession, Lisa also runs a home staging business. Lisa and her team can stage a home to make it sell faster and less stressful for agents and homeowners.
Actually, this is not the first time that we have the pleasure of having Lisa with us. A while ago, I also had an exclusive interview with her. Here’s the piece: “Why Home Staging and Real Estate Agent could be the Perfect Career Match? (Exclusive Interview with Lisa Rabe)“
About Charlie Misicka

I came across Charlie because of Lisa. He helped Lisa in designing her website for her real estate business. I was immediately intrigued by the outstanding graphical works Charlie has done.
Charlie is a photographer that specializes in portraits and lifestyle photography. He loves doing on-site shoots with creative integration of products, interests, and personal locations.
He has over two decades of extensive experience in this field. He also does real estate photo shoots for his clients. In fact, many of the photos in this article are provided by Charlie.
Expert Tips from the Real Estate Girl Guru , Lisa Rabe
Hi Lisa, thank you for joining us again today. I know that in addition to providing home staging services, you are also a real estate broker. I’d love to hear your professional insights about real estate photos.
From your day-to-day interaction with clients, do you find that the quality of the real estate photos plays a crucial part in a transaction?
Real estate photos are critical to the marketability of a property. I find that proper lighting and angles can make or break the presentation of a listing to the public.
I’ve had photographers in the past who did not understand the importance of time of day to have the best sun, or who did not care if it was too dark outside to get the proper lighting on interior pictures.
Real estate photography is unique in that you have to highlight dark corners and basements sometimes and need multiple flashes from a bunch of angles to do so.
Can you please talk about the importance of each section of the house? What atmosphere are you trying to portrait in the photo? What are some practical tips to prepare for the photoshoot?
Step one for all sellers prepping their homes: Declutter, declutter, declutter.
A buyer needs to picture themselves in this home and cannot see past grandma’s favorite gnome and your kids collection of Pokemon cards. It sounds trite, but it’s so true.
Besides, you need to pack anyway, you’re moving! Another thing to remember for the entire house is to ensure all your light fixtures have matching light bulbs.
The worst is when we show up to shoot a house and half the fixtures are missing bulbs! Also, make sure all the fans are in off position, you don’t need a big blur on your ceiling in the photo.
Exterior
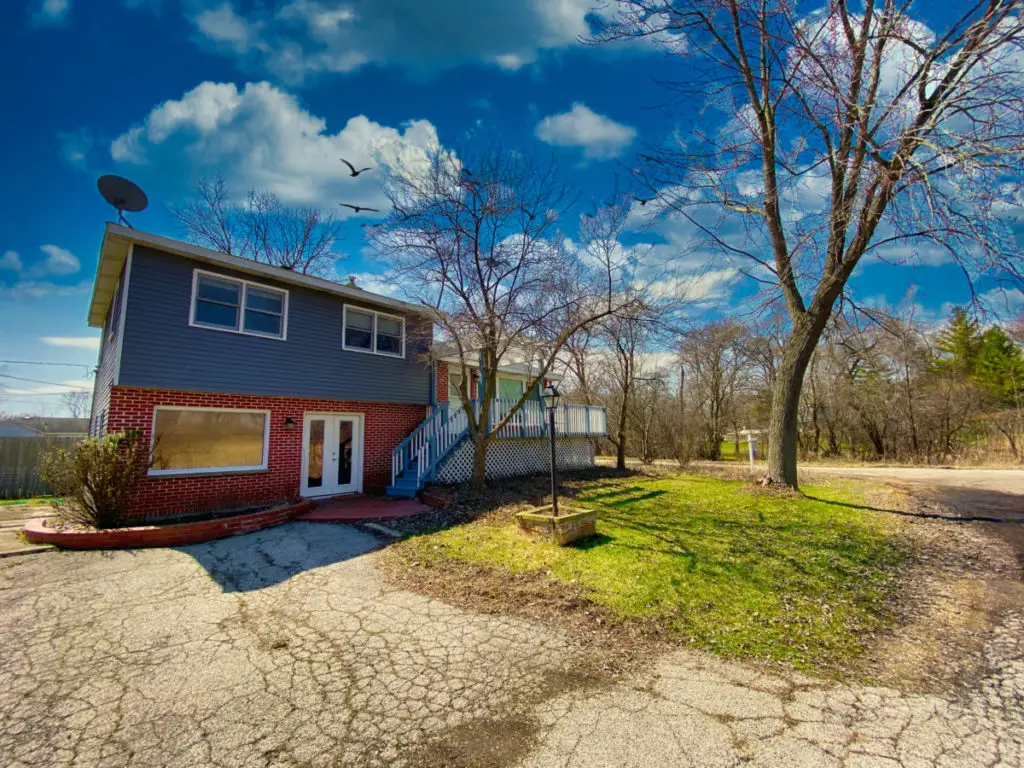
The exterior photo is always the first one a buyer will see. It is critical to make sure that your home has strong curb appeal. Remove any brush or leaves, spruce up the yard by trimming bushes and trees and add some flowers for a pop of color.
If it is winter, try to make sure you deck or patio is cleared so potential buyers can tell that it is there. If your home needs a coat of paint, be sure to do so.
If you need to do a layer of sealcoat on the driveway, then pay the small amount to make it look shiny and new.
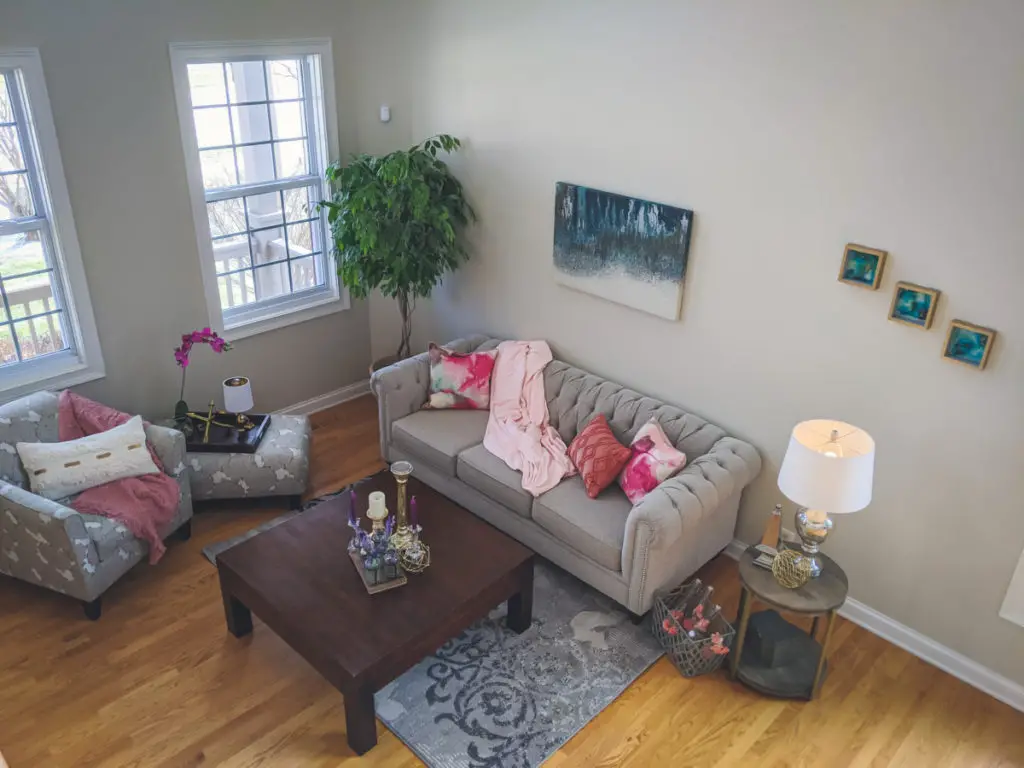
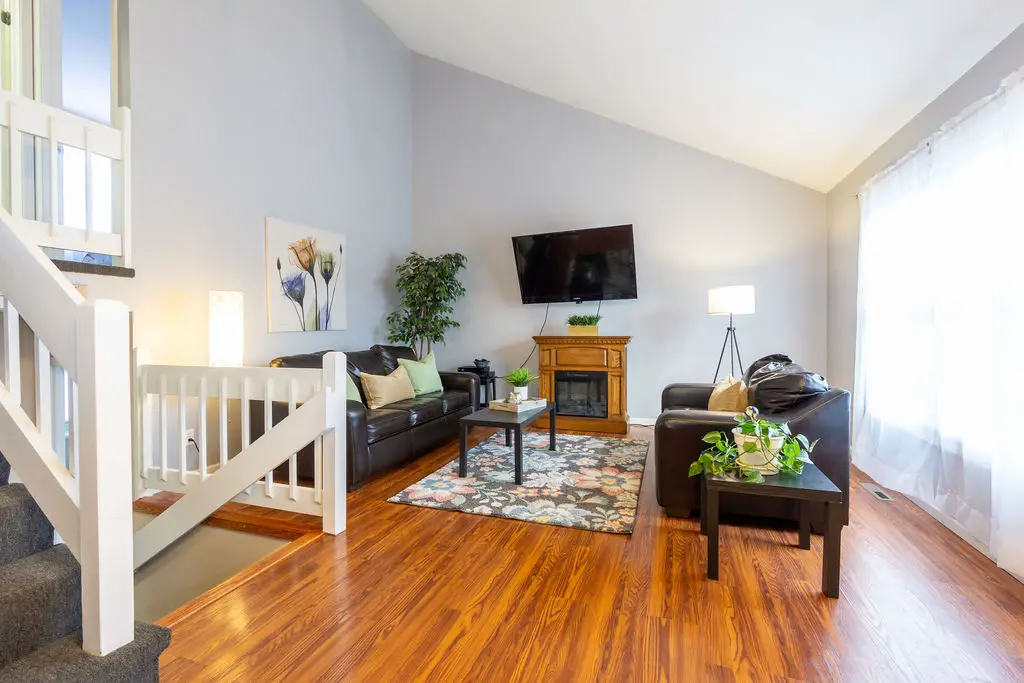
Living room
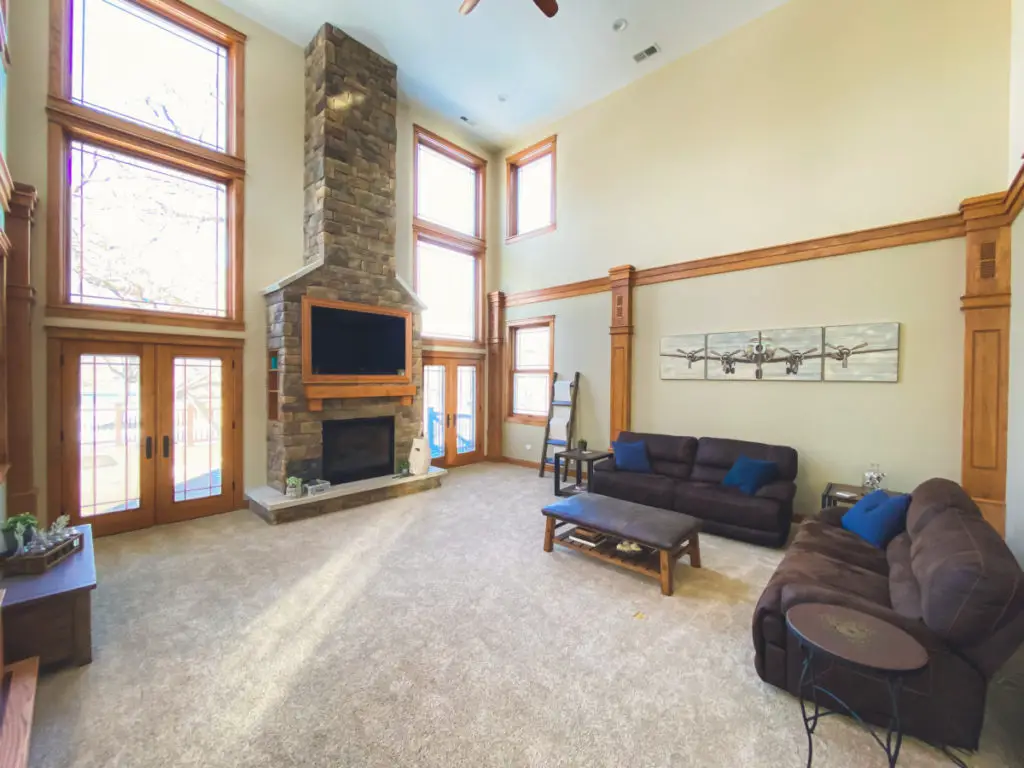
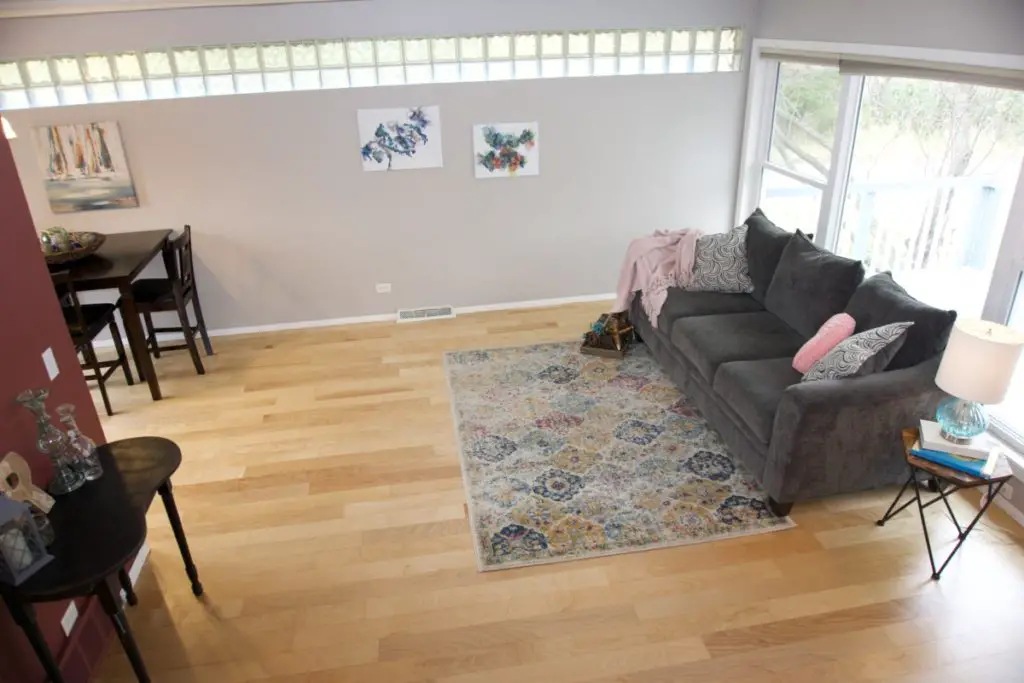
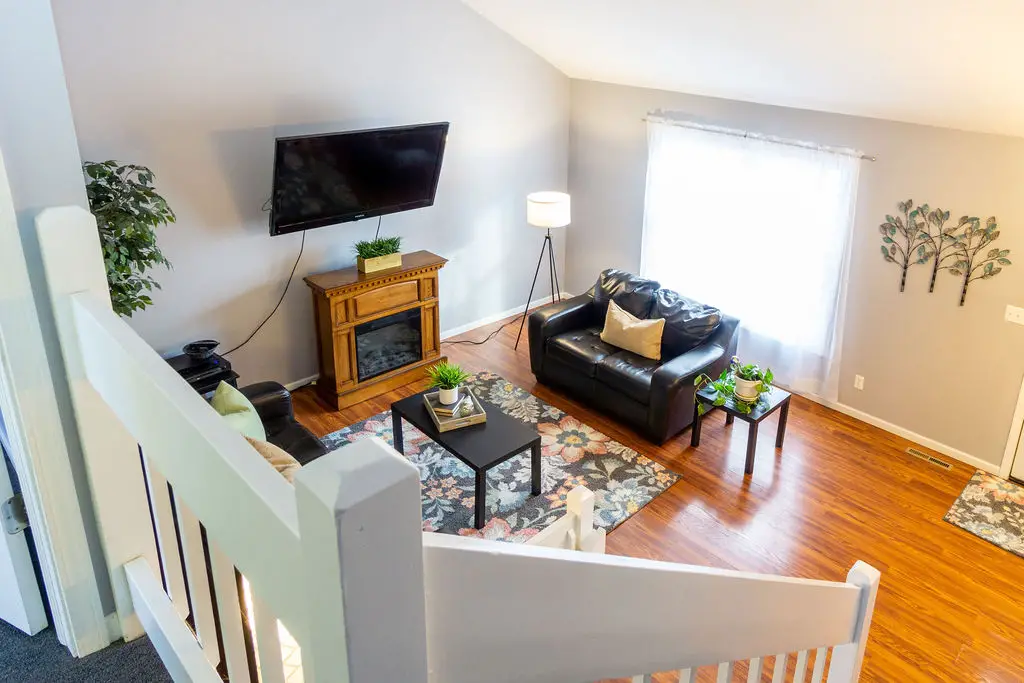
A living room really needs to feel comfortable but also fashionable. Remove all clutter from surfaces and add softness to your chairs and couches by putting fresh pillows and throw blankets out with a pop of color.
I love marigold and coral this season. Both go really well with a lot of neutral colors. For your side tables have lamps turned on for the photos to add a layer of soft lighting.
Kitchen
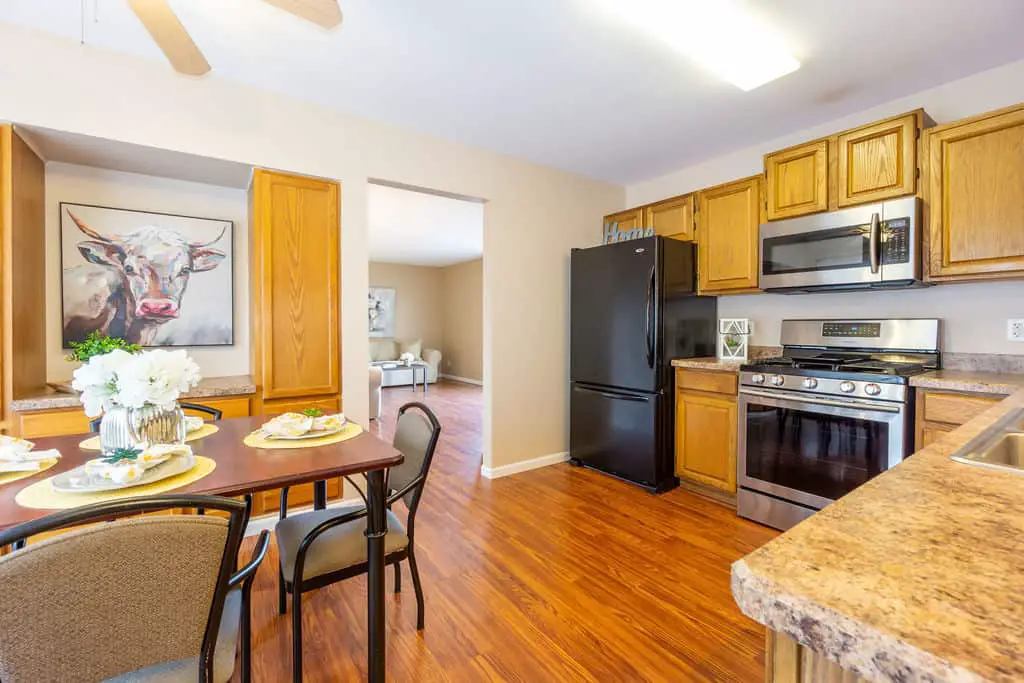
The center of the home is its kitchen. Most buyers I work with look at the exterior upkeep of a home and at a kitchen, and those two things will help them decide if they want to see the home in person or take a pass.
Common mistakes I see in photos of a kitchen space is too many tools on the counter and a lot of clutter on the fridge. Clear all magnets and papers from the fridge, it needs to look fresh and clean.
Do not have a bunch of tools on the counter such as the coffee maker, knife block, blender. Hide those for the photos.
If you want to do a bowl of green apples or yellow lemons for some color those are great options. I often lay a pretty towel on the counter next to the sink to soften the look of the room, or some stainless-steel serving utensils in an upright canister.
You want it to feel lived in but in an exceptionally clean, staged way.
Dining room


Dining rooms are typically quite easy to prepare for a photo. I always like to highlight the table by adding a tablecloth and some dining ware. If you do not have neutral dining ware such as white or black, then just do some nice cloth napkins in napkin rings at each place with a glass.
A simple centerpiece is always ideal for a dining room as well. Don’t feel trapped into always using a floral centerpiece, a bowl with balls or lemons or succulents could look really pretty as well. Always keep it simple.
Bathroom
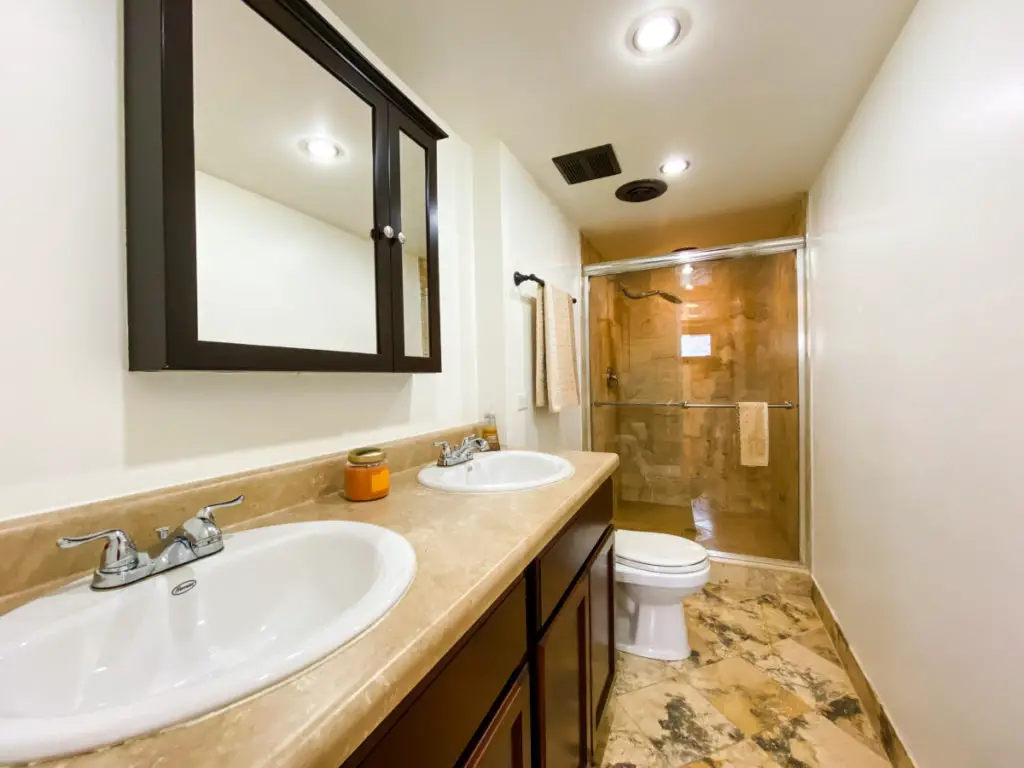
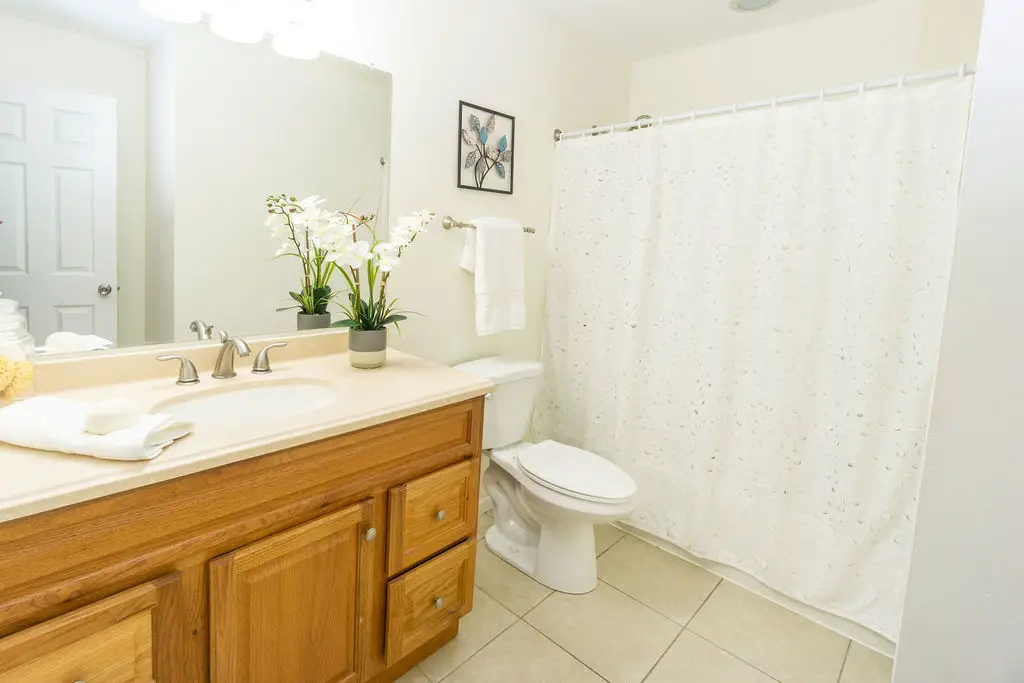
When you have a small space, like a bathroom, the key is to keep it completely decluttered. I often don’t use soap in my photos because it’s unnecessary and doesn’t give the right tone (unless it is exceptionally pretty).
I love to add a candle, a hand towel, a nice shower curtain, and keep the space free of tissues, toilet paper, toilet bowl scrubbers and plungers. Less is more. Give the illusion of a spa.
Backyard
The backyard is best viewed as a retreat. If you have beautiful lawn furniture, a hammock, or a firepit, then showcase those. Light the firepit and get some great twilight photos with it burning.
The rules for the front yard obviously apply to the backyard. You want everything nice and tidy with mulch spread on the flower gardens and trees and hedges trimmed.
Bedroom


This room is a critical one that many people overlook. This space needs to feel like a really nice hotel. Buy a new bedspread in a solid color. If your walls are neutral you can pick a bold color.
If not, stick with white or cream. I like to use Navy for a lot of our photo shoots as that looks good with an array of colors and can blend with a homeowners décor.
Buy some extra fluffy pillows with shams to go with the bedspread. More is better with pillows! Ideally have at least 4-10 to give the bed a comfy look.
Make sure that your alarm clocks, books, glasses, and remotes are put away. Having table lamps to provide soft lighting is key for nice bedroom photos. I also like to arrange a throw over the end of a bed.
Expert Tips from a Real Estate Photographer, Charlie Misicka

Can you please tell us about your real estate photography services?
I’ve been doing real estate photography for a little over a year now, though I’ve been doing photography in general for the last twenty years.
I enjoy working with clean modern houses the most, not to say I don’t like other houses, but the modern look is something I’ve always been drawn to.
What really separates a good set of professional real estate photos from ones that are just taken from a smartphone?
What separates professional photos from others, isn’t actually the camera they are taken on. I have shot some houses using only an iPhone 11 Pro when it was absolutely needed because of time constraints and not having access to my gear at the time.
What makes the difference between the photos on a camera and a smartphone is the person taking them, along with the years of experience they bring and the editing afterwards.
It is far easier to use a professional camera however, as the photo files have a great deal more information in them to use later in the editing process than a smartphone does.
I’ve heard that the lighting of a room is crucial to a photo. What suggestion can you give to homeowners for better lighting?
Lighting is a very key point in photography and can sometimes make or break a shoot. The homeowners themselves don’t really have much control over the lighting other than to make sure each room has working light bulbs in them.
If the lighting of a room is not good enough, do you usually bring lighting equipment to the set?
I will use natural light anytime I can as it makes photos look 100X better than a flash, but I supplement the natural light when needed with flash. I will even sometimes combine exposures on the computer to really even out the lighting if needed.
For outdoor photos I need a sunny or partly cloudy day and will usually want to take them during early morning or dusk to get the right look.
Typically speaking, how long is a photo session of a property?

When I shoot most regular sized house (2,000 – 2,400 square feet) it takes me about 20-30 minutes to shoot the house. This can take a bit longer depending on the layout of the home and if the home was already prepared properly for the photo shoot.
Generally, the house should already be clean, staged and 100% ready for me to come in and shoot, as this will make things much smoother.
As a professional courtesy, I always try to watch out for things that seem off or shouldn’t be in the shot and move those if I can as well.
After I complete the photography, I then edit the photos, which takes maybe another hour or so. I will edit the photos to make them pop and fix any minor issues that would mar the photo and make sure it portrays the best look for that room.
All told, my turn around time on most jobs is between 24-48 hours, though I do always tell agents if there is a time crunch I can try to get them done sooner if possible.
Some clients may require more privacy, is it common that photos will not be taken of the interior of closets, garage, shed?
Generally photos are never required to be taken inside of a closet or shed, but sometimes owners want inside shots of the garage to showcase the space.
It really all depends on what my client (the listing agent) wants and what their client has asked them for. I will always respect their requests and privacy.
I do usually want to be able to be the only person present for the photoshoot, but can be flexible when needed.
Do you touch up photos with software?
I do! I would say 99% of real estate photographers do at least some minor color and lighting edits.
Some photographers do a lot more editing on each photo, though I prefer to do as little as possible and prefer a natural look to the shots instead of the “over polished magazine” look some go for. I shoot for a middle ground when clients ask though.


Besides work on residential properties, Charlie also takes photos for businesses.
What are some tips you could give to homeowners for a better photo result?
Those are generally things the listing agent will talk to the homeowners about before the photoshoot, however things I can think of that people want to be aware of are: make sure the house is clean, non-cluttered, all personal photos put away, toilet lids closed, and any feature pieces like a fireplace are on and ready.
Generally they want to make the rooms look like they would in a showroom.
A helpful infographic which summarizes how to prepare for real estate photos

The bottom line on real estate photos
That’s a lot of insightful sharing. I’m sure you can now understand the benefits of having beautiful real estate photos and have picked up some great tips from Lisa and Charlie.
Once again, I thank Lisa and Charlie for taking the time to give this interview and share such incredible tips and experiences with us.
If you have any questions about real estate sales or home staging, you can find Lisa at:
- www.realestategirlgurulisarabe.com
- www.facebook.com/LisaRabeRealtor
- www.instagram.com/realestategirlguru/
If you want to discuss real estate photos, you can find Charlie at
- Phone: 630-391-3973
- Email: cmisicka@gmail.com
- Website: http://www.charliemisicka.com/
I wish both Lisa and Charlie all the best and continued success in their professions. I hope you like this post. If so, be sure to share it with your friends and colleagues.